Billing
Sell your packages with Stripe and PayPal, open the order page, run referrals and issue invoices.
Billing turns HF Panel into a shop for your hosting. Customers order a package on the order page, pay by card (Stripe) or with PayPal, and get their account automatically. The same screen holds the referral programme, the order list and the invoices the panel issues. Discount codes, VAT and unpaid invoices each have their own screen: Discount codes, Tax & currencies and Unpaid invoices.
Where: Server Admin › Billing › Billing (on the official edition: the Invoices tab of Server Admin › Business)
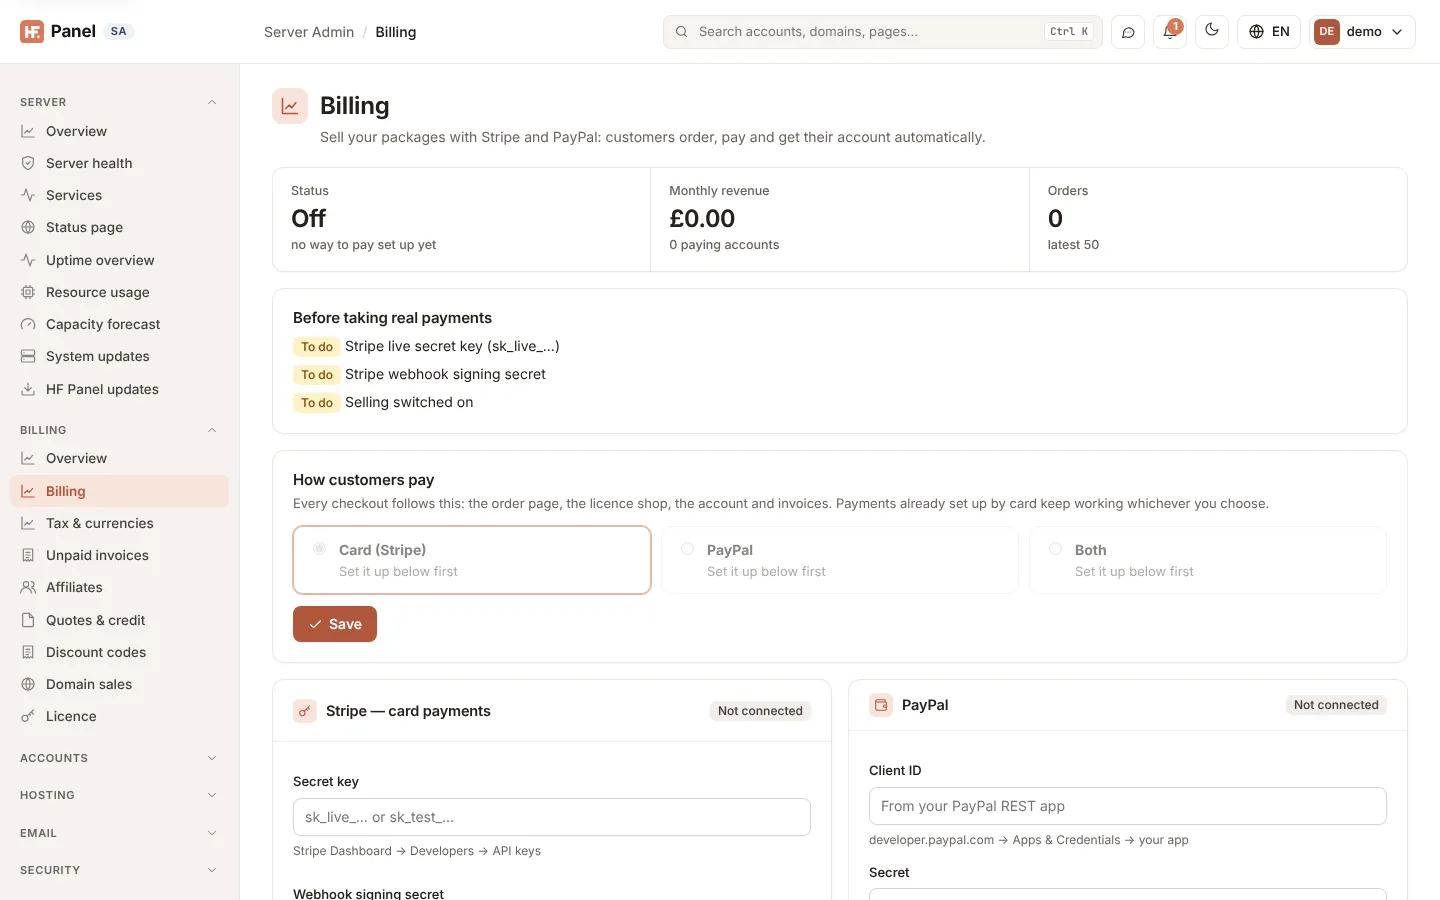
The figures at the top show the Status (Selling or Off, with the ways to pay that are set up), the Monthly revenue with the number of paying accounts, and the number of Orders (the latest 50). Click Order page to open your public order page.
Before taking real payments
Until everything is ready for real money, a Before taking real payments card under the figures lists what is
left: a Stripe live secret key (sk_live_…), the Stripe webhook signing secret, PayPal in live mode with its
webhook connected (only when you offer PayPal), and Selling switched on. It also warns when one provider is live
and the other is still in test or sandbox mode, because some customers' payments would then not be real. When every
step is done the card shrinks to a green Ready for real payments line.
To go live: create live keys in the Stripe Dashboard (switch off Test mode), add the webhook endpoint again in live mode and paste its new signing secret; in PayPal create a live REST app, choose Live in the PayPal form, paste its client ID and secret and click Connect PayPal again. Then make one small real order yourself and refund it from the Stripe or PayPal dashboard.
Before you start: set up Stripe and PayPal once
The Set up (once) card lists the steps with your server's own addresses filled in.
Stripe
- In the Stripe Dashboard, go to Developers → Webhooks → Add endpoint and enter the webhook address shown on the card.
- Choose these events:
checkout.session.completed,checkout.session.async_payment_succeeded,checkout.session.async_payment_failed,invoice.paid,invoice.payment_failed,customer.subscription.updated,customer.subscription.deleted. - Copy the endpoint's Signing secret (
whsec_…) into the Stripe form. - In Settings → Billing → Customer portal, turn the portal on. Allow plan switching between your products if you want customers to upgrade themselves.
PayPal
- At developer.paypal.com → Apps & Credentials, click Create App (Merchant) and copy its client ID and secret into the PayPal form.
- Click Connect PayPal. The panel checks the keys and sets up the webhook itself.
- Test with Sandbox first, then switch to Live with the live app's keys and connect again.
Then put a link to your order page on your website.
Note: if your panel's API has its own address, the card also shows the old webhook address, which keeps working.
Connect Stripe
- In Stripe — card payments, paste the Secret key (it starts with
sk_live_,sk_test_, orrk_for a restricted key). Find it under Stripe Dashboard → Developers → API keys. - Paste the Webhook signing secret (
whsec_…). - Click Save.
- Click Check Stripe & sync packages. The panel tests the key and makes every paid package ready to sell in Stripe. The message says whether Stripe is in test or live mode.
Saved keys are never shown again: the form shows only the first characters and the mode. Leave a field empty to keep the saved value.
Important: with a secret key saved, you must also save the webhook signing secret. Without it, new card orders do not become accounts.
Connect PayPal
- In PayPal, paste the Client ID and Secret from developer.paypal.com → Apps & Credentials → your app.
- Choose the Mode: Sandbox — test payments or Live — real payments. Use the client ID and secret of the same mode.
- Tick Offer PayPal on the order page, the licence shop and invoices when you are ready to show it to customers.
- Click Save.
- Click Connect PayPal. Later, the button reads Check PayPal again.
Note: changing to another PayPal account or mode disconnects PayPal. Click Connect PayPal again afterwards.
Open the order page
- In Selling, choose the Currency your package prices are charged in: GBP — £, EUR — € or USD — $.
- Tick Open the order page and take payments.
- Click Save.
Customers choose how to pay: by card (Stripe) or with PayPal, whichever you have set up. You need at least one of them before you can open the order page.
Tip: to sell in more currencies, or to charge VAT by country, use Tax & currencies.
Run a referral programme
Every customer gets a link under Refer a friend in their Control Panel. When someone orders through it and makes their first payment, the customer who shared it gets a credit off their next invoices.
- In Referral programme, tick Switch on.
- Set the Credit per referral (0 to 1,000 in your currency).
- Optionally type a Discount code for the friend. Make the code first, in Discount codes (linked under the field).
- Click Save.
Recent referrals lists who referred whom, and whether the reward was given or is waiting for first payment.
Orders
Orders lists the latest 50 orders with the date, username, domain, package, email and status: Account made, Needs attention or Not paid. The line above it says which packages have a free trial (set per package).
Set up your invoices
The panel issues its own numbered invoices, as PDF.
-
In Invoice details, fill in what invoices show:
Field What it does Company name Your company name (up to 100 characters). Address Your address (up to 400 characters). Company number Printed on the invoice (up to 40 characters). Number prefix Up to 10 letters, numbers or -, for exampleHF-.Next number The next invoice number. Once invoices are issued, it can only go up. How to pay Bank details for invoices paid by transfer (up to 400 characters). Terms (small print) Up to 600 characters. Email each invoice to the customer as a PDF Sends every new invoice by email. -
Click Save invoice details.
The VAT number, the VAT rate and whether prices include VAT are set in Tax & currencies (the Manage in Tax & currencies link on the card).
Make an invoice by hand
- In New invoice, choose the Account.
- Fill in up to three lines: Description (up to 200 characters), Qty and Price.
- Set Due in (days) (0 to 90) and an optional Note.
- Tick Already paid if the customer has paid, and Email it to the customer now to send it.
- Click Make invoice.
Manage invoices
The Invoices list shows the latest 50 invoices with date, number, account, amount and status (Paid, Unpaid, Void or Failed; an invoice past its due date shows Overdue with the number of days). Invoices made by hand are marked by hand; card invoices show their Stripe number.
| Button | What it does |
|---|---|
| Opens the invoice as a PDF. | |
| Mark paid | For an unpaid invoice made by hand: marks it paid and emails a receipt. |
| Void | For an unpaid invoice made by hand: cancels it. Its number stays used. |
| Envelope icon | Emails the invoice again. |
| View | For a card invoice without a panel number: opens it at Stripe. |
Note: card and PayPal payments are managed in Stripe and PayPal, so they cannot be marked paid or voided here.
Unpaid invoices
Reminders and suspension for overdue invoices are set in Unpaid invoices (the Manage in Unpaid invoices link above the invoices list).