WordPress
Manage every WordPress site in your account — updates, security hardening, admin passwords, maintenance and debug mode, address changes and networks of sites (multisite).
The WordPress screen (the WordPress Toolkit) finds every WordPress site in your account and lets you look after it from one place: updates, security checks, handy switches and changing the site's address. Every change runs live in a window, so you can watch what happens.
Where: Control Panel › Websites › WordPress
WordPress sites are found by themselves. A site you install with the App installer or upload yourself shows up here without any extra step.
Install WordPress
- Click Install WordPress.
- The App installer opens with WordPress chosen. Follow the steps there.
To install a network of sites straight away, choose Subdirectories or Subdomains under Network of sites (multisite) in the install form. See Network of sites (multisite) below.
When you have no WordPress sites yet, the screen shows No WordPress sites yet with the same button.
Choose a site
When you have more than one site, the picker at the top lists each one by its folder (without web/ and
/public_html) and its WordPress version. Click a site to show it.
The site's header shows:
- its address and folder, its WordPress version and the number of plugins;
- Up to date, or how many updates are waiting (for example 3 updates waiting);
- Maintenance mode on and Debug mode on when those are on;
- the number of known vulnerabilities in its plugins, if any.
Click Open WordPress admin to open the site's /wp-admin/ in a new tab.
Update WordPress, plugins and themes
The Updates card lists WordPress itself, every plugin and any themes with an update.
| To update | Do this |
|---|---|
| Everything at once | click Update everything in the site's header and confirm. It updates WordPress, every plugin, every theme and the translations. |
| WordPress only | click Update on the WordPress row and confirm |
| One plugin | click Update on the plugin's row |
| Every plugin | click Update all plugins |
| Themes | click Update themes on the Themes row |
A row without an update shows a green tick. Each plugin row also shows whether the plugin is active, and updates itself when its automatic updates are on.
Tip: take a quick backup before you update a big site. See Backups.
Known vulnerabilities
HF Panel checks each plugin's installed version against a free vulnerability database. A plugin with a known problem shows Known vulnerability, its severity and a link to the advisory, then either fixed in version: update now, or no fix yet: deactivate and delete it. If the database cannot be reached, the card says so.
Note: inactive plugins are worth deleting from WordPress admin. Even switched off, an outdated plugin can be used to break in.
Security
Check for changed files
Click Check now on Check for changed files. It compares the WordPress and plugin files with the official copies and lists any that were changed — a sign of hacked or injected files.
Change an administrator's password
- In Admin password, choose the administrator.
- Enter a New password of at least 8 characters.
- Click Change.
WordPress then signs that user out everywhere.
Switches
| Switch | What it does |
|---|---|
| WordPress updates itself | Every version, or Security only (security releases only — the WordPress default) |
| Plugins update themselves | Turn on or Turn off automatic updates for every plugin |
| Maintenance mode | visitors see "briefly unavailable" while you work. Turn it off when you are done. |
| Debug mode | writes PHP errors to wp-content/debug.log. They are never shown to visitors. Turn it off when done. |
| Caches | Clear empties WordPress's object cache and temporary data |
Tip: to show your own maintenance page for any website, not only WordPress, use Maintenance mode.
Security hardening
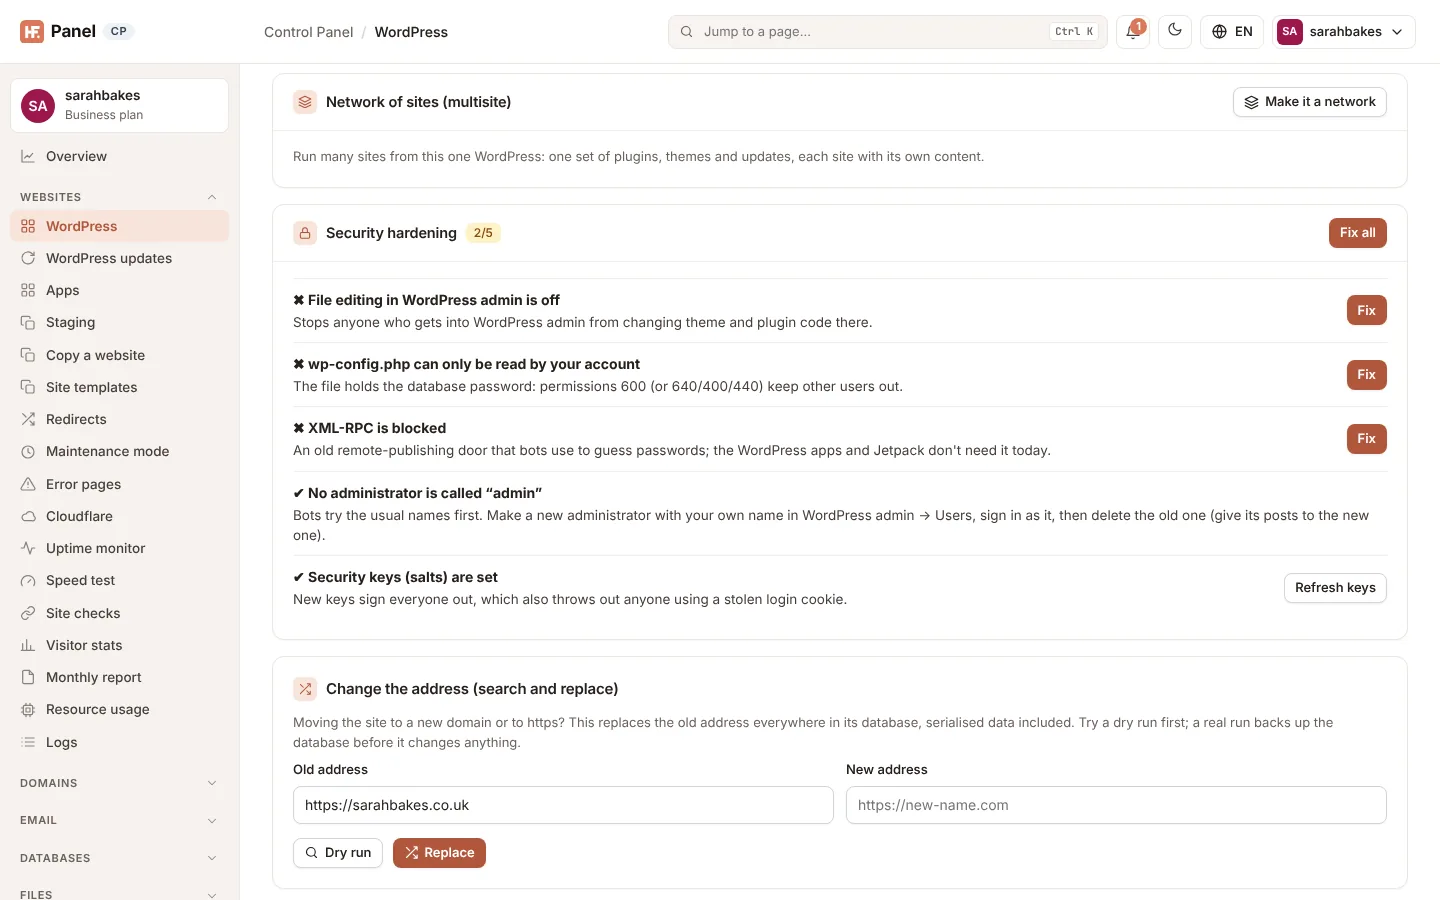
The Security hardening card is a checklist for the chosen site. The pill shows how many checks pass, for example 4/5. Each check shows ✔ (passes), ✖ (fails) or ? (unknown — not known yet).
| Check | What it means | Button |
|---|---|---|
| File editing in WordPress admin is off | stops anyone who gets into WordPress admin from changing theme and plugin code there | Fix / Undo |
| wp-config.php can only be read by your account | the file holds the database password; permissions 600 (or 640, 400, 440) keep other users out | Fix |
| XML-RPC is blocked | an old remote-publishing door that bots use to guess passwords | Fix / Undo |
| No administrator is called "admin" | fails when an administrator has a name bots try first, such as admin, administrator, root, test, wpadmin, webmaster or user | none — fix it by hand |
| Security keys (salts) are set | new keys sign everyone out, which also throws out anyone using a stolen login cookie | Refresh keys |
Click Fix all to apply every automatic fix that is needed (all but the security keys).
To fix the administrator name: in WordPress admin › Users, make a new administrator with your own name, sign in as it, then delete the old one and give its posts to the new one.
Warning: Refresh keys signs everyone out of WordPress, you included.
Change the address (search and replace)
Use this when you move the site to a new domain, or from http to https. It replaces the old address everywhere in the site's database, serialised data included.
- Check the Old address (it is filled in with the site's current address).
- Enter the New address, for example
https://yourdomain.com. - Click Dry run. The message tells you how many places in the database would change. Nothing is changed.
- Click Replace and confirm.
A real run backs up the database first and tells you where the backup was saved.
| Rule | Why |
|---|---|
| Both addresses need a dot, 4–200 characters, no spaces or quotes | otherwise: "Enter the old and the new address…" |
| The addresses must differ | "The old and the new address are the same." |
| The new address can't contain the old one | running it twice would repeat it. Replace the domain alone instead, for example old-name.com → new-name.com. |
Network of sites (multisite)
One WordPress can run a whole network of sites: they share the plugins, themes and updates, and each site has its own content, users and settings. The Network of sites (multisite) card shows the chosen site's network, or lets you turn a single site into one.
Make a site a network
- Click Make it a network on the Network of sites (multisite) card.
- Choose how the sites get their addresses:
- Subdirectories —
example.com/shop/,example.com/blog/. Works for every site, also one in a folder. - Subdomains —
shop.example.com. Needs WordPress at the top of its domain (the folder empty).
- Subdirectories —
- Click Make it a network.
The site's files and database are backed up first to ~/backups/pre-update/, the same backup the
safe updates make. Then WordPress becomes a network and the web server gets the
rules the sites' addresses need.
Subdomain sites: DNS and certificate
Subdomain sites need two things for *.example.com: a DNS record that sends every subdomain to the server, and a
wildcard certificate for https.
| Where the domain's DNS is | What happens |
|---|---|
| This server (its nameservers) | The * A record is added to the zone for you. Click Get the wildcard certificate on the card once the domain uses this server's nameservers. |
| Somewhere else | The card shows the record to add there: an A record for *.example.com pointing to the server's address. Upload a wildcard certificate of your own under SSL/TLS. |
Wildcard certificates are for main domains. A network on a subdomain (blog.example.com) can use subdirectory sites,
or a certificate you upload for *.blog.example.com.
Tip: without a wildcard certificate, tick Serve … as a subdomain of its own when you add a site. The site's name becomes a subdomain website of your account, so AutoSSL gives it a free certificate once its DNS points here.
Add a site
- Click Add a site.
- Enter a short name (at least 4 letters, numbers or
-) —shopbecomesexample.com/shop/orshop.example.com— or a domain of its own, such asanother-shop.com. - Optionally enter the Site title and the Admin email (your account's email if empty).
- For a domain of its own, keep Add … as a parked domain ticked: the domain is added to your account as a parked domain of the network's website, so the web server answers it and AutoSSL covers it. Point the domain at the server.
- Click Add site.
Look after the sites
Each site of the network is listed with its state. The main site stays as it is; for the others:
| Button | What it does |
|---|---|
| Archive / Unarchive | an archived site shows visitors that it is no longer available; its content is kept |
| Deactivate / Activate | a deactivated site can't be visited or signed in to; its content is kept |
| Delete | deletes the site with its content and uploads, after you confirm. This cannot be undone. |
Plugins and themes for the whole network
- In the Updates card, each plugin has Activate on every site or Deactivate on every site. A plugin that is on for the whole network shows active on every site.
- On the network card, each theme has Offer to every site or Stop offering: the sites can only use themes the network offers.
Updates, Check for changed files, the hardening checklist, maintenance mode and the other switches work on the whole network. Updating WordPress also upgrades every site's database. Admin password lists the network's super admins.
Web server rules
A network needs rewrite rules for its sites' addresses, and old networks (made before WordPress 3.5) for their
uploads (ms-files). HF Panel writes them for you: into the site's .htaccess, and into the Nginx configuration of a
website that runs on Nginx only. If the card shows ✖ Web server rules — for a
network you made by hand, or after moving one here — click Set up.
Update all your sites at once
The Update all your sites at once card updates every WordPress site in your account, one after another. Click Plugins, Themes or Plugins and themes, then confirm. A site that fails is listed and the rest carry on.
Caching
Pages are cached with the website's Page cache, or on a server that runs OpenLiteSpeed with LiteSpeed Cache; both are under Speed test › Speed settings.